

Background
SMB (Server Message Block) is a network file-sharing protocol used for sharing files, printers, and other resources between computers on a network. SMB is primarily used in local area networks (LANs), providing high performance and low latency file transfer and sharing services without complex network configuration, making it suitable for office, home network, and other scenarios.
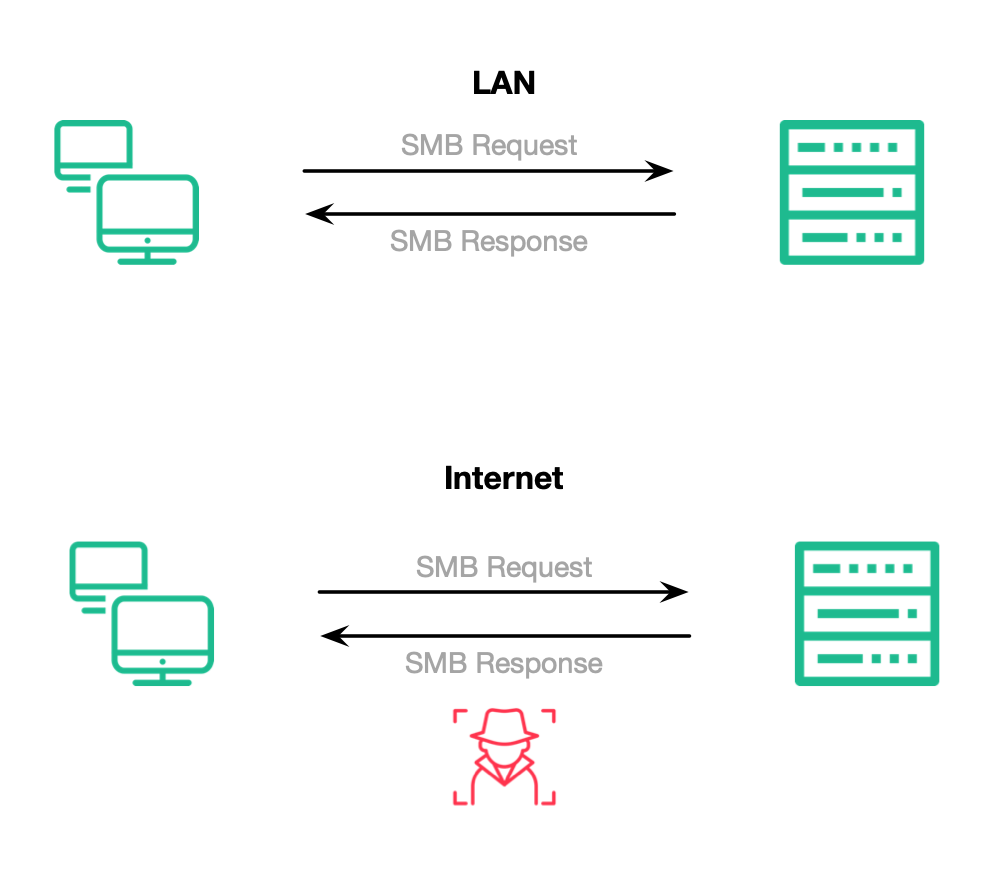
In practice, for cross-regional collaboration and the popularity of remote work, accessing shared resources over the Internet is often necessary. Security becomes a primary challenge when transmitting data over the Internet, with risks like data interception and man-in-the-middle attacks. Although SMB 3.0 supports encrypted data transmission, it requires upgrading the server and client to support SMB 3.0 and complex encryption configuration.
This article introduces an alternative solution: using ZTM to transmit SMB protocol data (hereinafter referred to as SMB via ZTM) to achieve secure remote access. This solution has the following advantages over SMB 3.0 encrypted transmission:
- Simplified configuration process without upgrading existing clients and servers.
- Unified encryption and authentication, simplifying management and enhancing security.
- SMB services that originally did not use authentication can enhance security through ZTM’s secure authentication.
- Improved transmission efficiency, reducing network latency and jitter.
- Suitable for remote work and cross-regional access, enhancing flexibility and compatibility.
About ZTM
ZTM (Zero Trust Mesh) is an open-source network infrastructure software. It is built on HTTP/2 tunnels and can run on any type of IP network, such as LAN, containerized networks, and the Internet.
ZTM can be used in various environments, from a 2-node personal network connecting home and workplace to a 10,000-node enterprise network connecting global offices and branches.
ZTM supports multiple CPU architectures like x86, ARM, MIPS, RISC-V, LoongArch, and various operating systems like Linux, Windows, macOS, FreeBSD, Android.
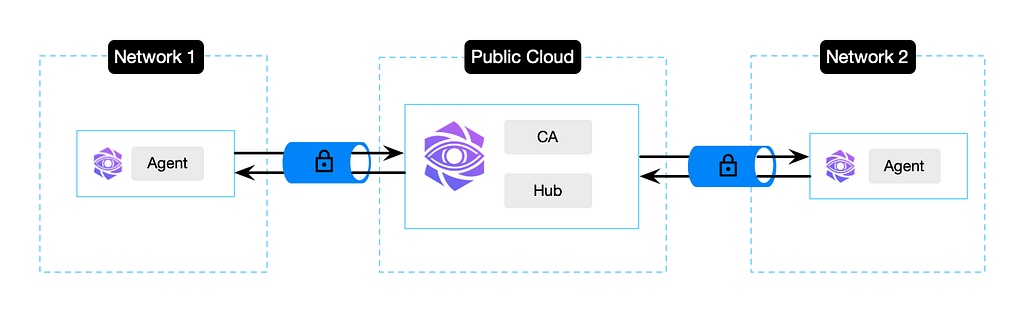
ZTM includes several core components:
- Traffic Forwarder ZTM Agent: Deployed in networks that need connectivity. It can be installed on personal computers, servers, edge, or endpoint devices. It connects to the ZTM Hub, initiates encrypted tunnels, and securely forwards the device’s traffic to the Hub.
- Traffic Forwarding Cluster ZTM Hub: Establishes encrypted tunnels with each Agent, forwarding requests from Agents to achieve multi-point access and high availability.
- Certificate Management Server ZTM CA: Manages certificates. It issues certificates, revokes certificates, and verifies the TLS certificates used by Agents for access.
Solution
When implementing ZTM, follow these steps. Steps 1, 2, and 3 are for infrastructure setup. Each network that needs to connect to the Hub must perform steps 2 and 3. Once connected to the Hub, repeat steps 4 and 5 as needed:
- Set up the ZTM Hub.
- Issue certificates for Agents.
- Deploy Agents and connect to the Hub.
- Register services.
- Map services to the local network.
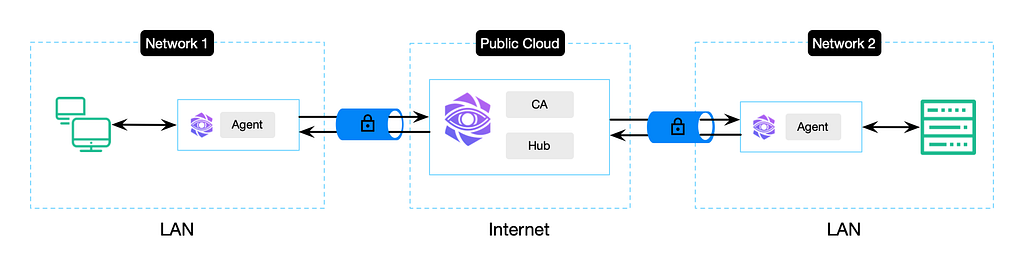
In this SMB via ZTM solution, install ZTM Agent in the networks where the SMB client and server are located. The Agents establish encrypted HTTP/2 tunnels with the ZTM Hub in the public cloud.
The Agent on the server side registers the SMB service to the Hub; the Agent on the client side maps the service from the Hub to a local port, providing SMB services to the local LAN clients (in the demonstration below, we will install the Agent on the device where the SMB client is located).
You will notice that the encrypted tunnel is initiated by the Agent, and the SMB service is not directly exposed to the Internet. Even if the SMB service itself does not have authentication capabilities, access via the client-side Agent still requires strong authentication using certificates.
Demonstration
In the demonstration, we will use a cloud host with a public IP, which can be purchased from cloud providers for 99 yuan, usually with 3–4M bandwidth, sufficient for forwarding 1080P or even low bitrate 4K.
The SMB service runs in my home network, while my computer is connected to a public network.
1. Run ZTM Hub
First, SSH into the cloud host and install ZTM CA and Hub using the ZTM CLI. The latest version of ZTM is 0.0.3. Install the CLI with the following command.
ZTM_VERSION=0.0.3
curl -sL https://github.com/flomesh-io/ztm/releases/download/v${ZTM_VERSION}/ztm-aio-v${ZTM_VERSION}-generic_linux-x86_64.tar.gz | tar -zxf -
sudo cp bin/ztm /usr/local/bin/ztm
Use the command ztm help to view CLI usage.
Start the ZTM CA service with the following command.
sudo ztm start ca --listen 127.0.0.1:9999
Next, start the Hub. By default, it listens on port 8888. You can modify this with the --listen parameter. We use the default value here.
sudo ztm start hub
2. Issue Certificates for Agents
Note: The JSON file contains the public and private keys. Please keep them safe. If lost, revoke the certificate using ztm evict USERNAME and issue a new certificate.
ztm invite home --bootstrap 13.229.223.113:8888 --output > home.json
ztm invite macbook --bootstrap 13.229.223.113:8888 --output > macbook.json
3. Deploy Agent on the SMB Server Side
Install the Agent on an Ubuntu virtual machine in my Homelab. Install the CLI first, then start the Agent using the CLI. By default, it listens on 127.0.0.1:7777, which can be modified with the --listen parameter to 0.0.0.0:7777.
sudo ztm start agent --listen 0.0.0.0:7777
This command configures the Agent as a system service. You can check its status with systemctl status ztm-agent.
4. Connect Agent to Hub
After starting the Agent, the most crucial step is to connect it to the ZTM Hub. There are two methods: command line and web interface.
Method 1: Using Command Line
In the command line window, run the following command to establish a secure tunnel with the Hub. The command format is ztm join MESH_NAME --as AGENT_NAME --permit JSON_FILE.
ztm join my-hub --as smb-server --permit home.json
Check the tunnel status with the command ztm get mesh.
ztm get mesh
NAME    JOINED AS   USER  HUBS                 STATUS
my-hub  smb-server  home  13.229.223.113:8888  Connected
Note: Use ztm left MESH_NAME to disconnect from the Hub.
Method 2: Using Web Interface
Open the web interface at http://<VM IP>:7777.
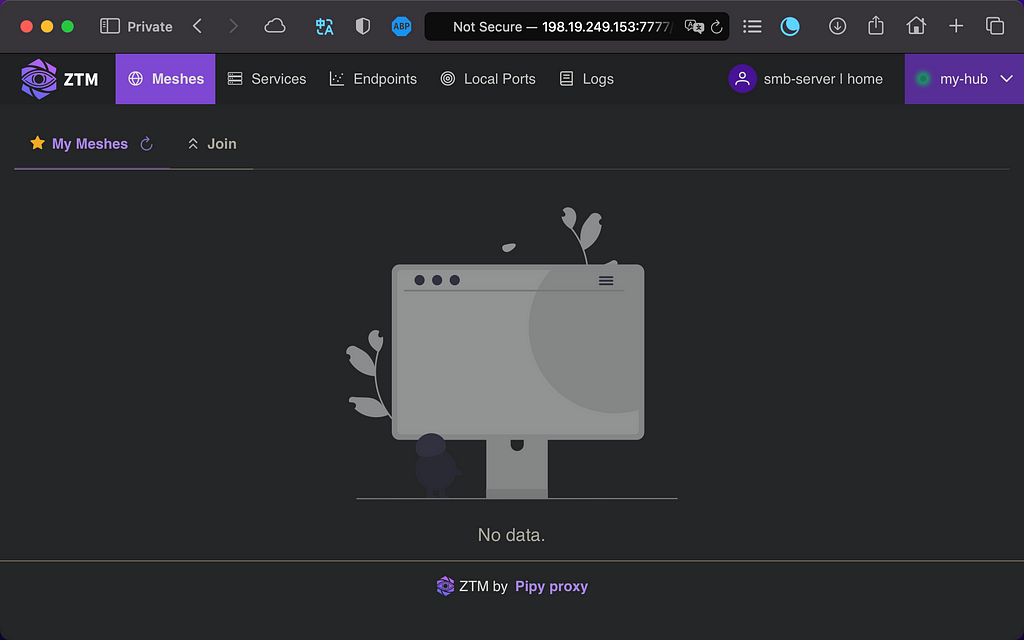
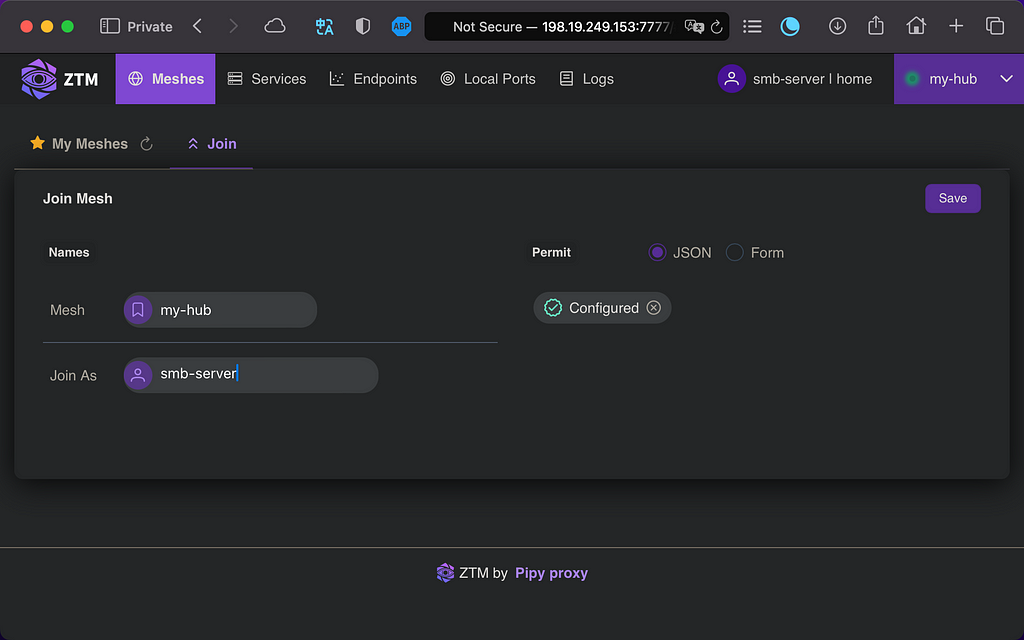
In the Meshes tab, click Join.
Fill in the information and click Save:
- Mesh: Enter your desired name, such as my-hub.
- Permit: Click + to select the previously issued home.json.
- Join AS: Enter your desired name, such as smb-server.
After saving, you can see the added Hub and its status in the Meshes tab. If the status is not Connected, check the contents of the issued JSON file.
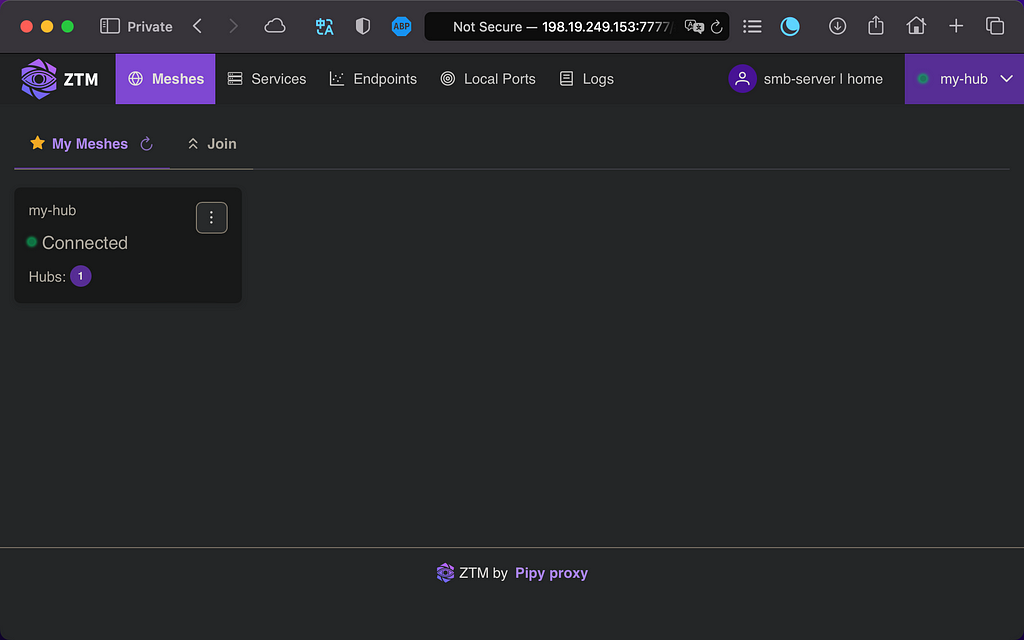
Note: Click the three dots on the right of the Hub to modify or disconnect it.
5. Register Service
To access the SMB service from outside, register the SMB service to the Hub on the Agent. This can be done using the command line or web interface.
Method 1: Using Command Line
The command format is ztm create service PROTOCOL/SERVICE_NAME --host SERVICE_IP --port SERVICE_PORT. Here, we use the existing SMB service, default port 445.
ztm create service tcp/smb-server --host 192.168.11.104 --port 445
Check the registered services with the command ztm get service.
ztm get service
NAME            ENDPOINTS
tcp/smb-server  1
Note: Use ztm delete service PROTOCOL/SERVICE_NAME to unregister the service.
Method 2: Using Web Interface
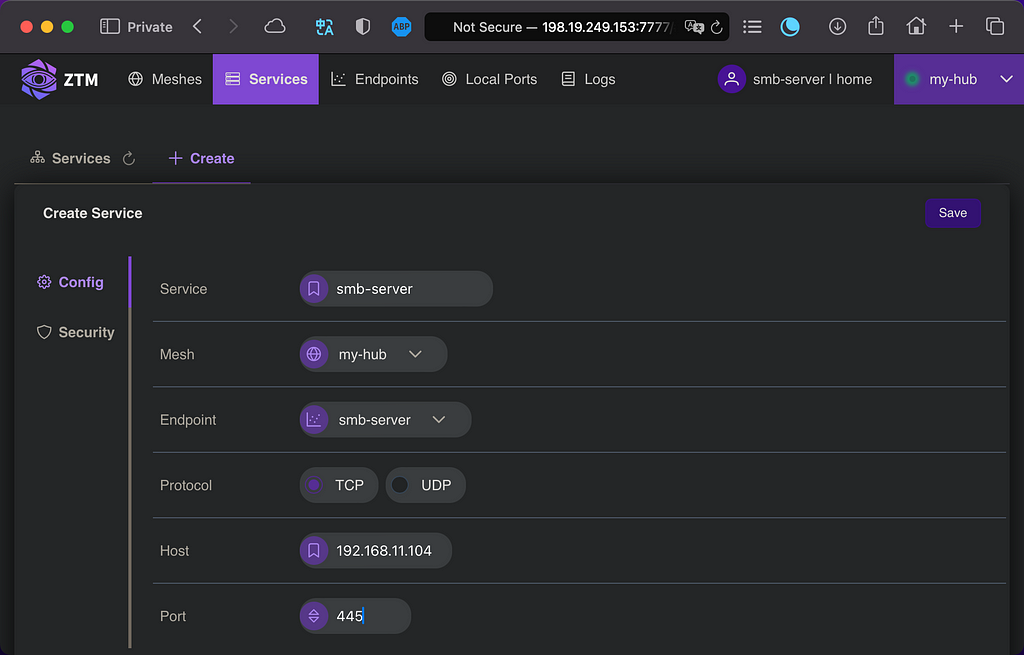
In the Services tab, click Create.

Fill in the service information and click Save:
- Service: Service name, such as smb-server.
- Protocol: Select the protocol corresponding to the service, TCP.
- Host: Service address, here it is the SMB service address 192.168.11.104.
- Port: Service port, here it is 445.
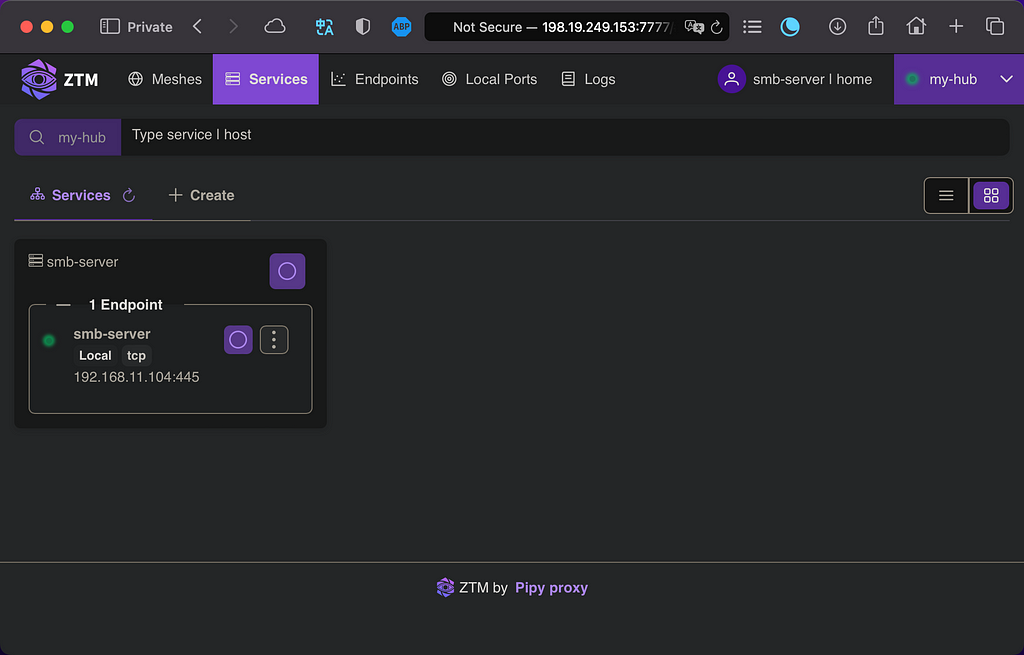
After saving, you can see the created service in the Services tab.
6. Deploy Agent on the SMB Client Side
First, install ZTM. You can download the corresponding platform CLI from here. There are CLIs for x86 and M chips on macOS and exe downloads for Windows.
My external device is a MacBook, so I download the arm64 CLI.
curl -sL https://github.com/flomesh-io/ztm/releases/download/v0.0.3/ztm-aio-v0.0.3-macos-arm64.tar.gz | tar -zxf -
sudo cp bin/ztm /usr/local/bin/ztm
After installing the CLI, start the Agent with the following command. It will automatically join the system service.
sudo ztm start agent
7. Connect Agent to Hub
Repeat the same steps, using the previously issued certificate macbook.json to establish a tunnel with the Hub. You can use the command line or web interface (http://localhost:7777). Here, we use the command line to complete it. For web interface operations, refer to previous steps.
ztm join my-hub --as macbook --permit macbook.json
Check the tunnel status.
ztm get mesh
NAME    JOINED AS  USER     HUBS                 STATUS
my-hub  macbook    macbook  13.229.223.113:8888  Connected
8. Map Service to Local
Service mapping can also be done in two ways: command line and web interface.
Method 1: Using Command Line
Use the following command to view registered services on the Hub.
ztm get service
NAME            ENDPOINTS
tcp/smb-server  1
Service mapping is done by creating a local port. The format is ztm create port LAN_IP/PROTOCOL/PORT --service PROTOCOL/NAME.
ztm create port 127.0.0.1/tcp/1445 --service tcp/smb-server
Check the created port.
ztm get port
NAME                ENDPOINT  SERVICE
127.0.0.1/tcp/1445  macbook   tcp/smb-server
Note: Use ztm delete port LAN_IP/PROTOCOL/PORT to delete the port.
Method 2: Using Web Interface
In the Services tab, find the discovered service and click the button in the upper right corner.
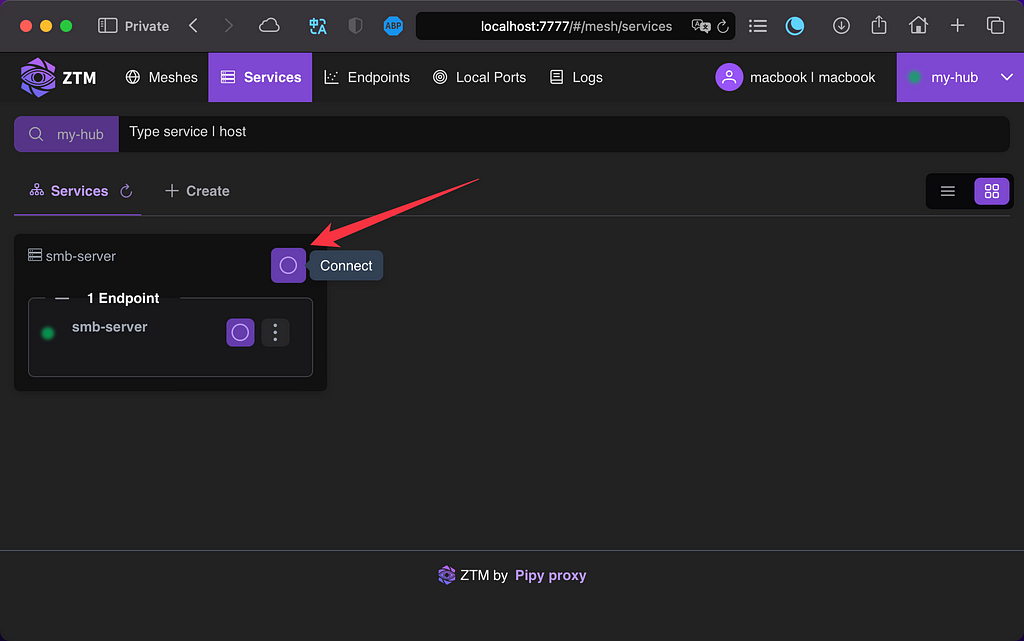
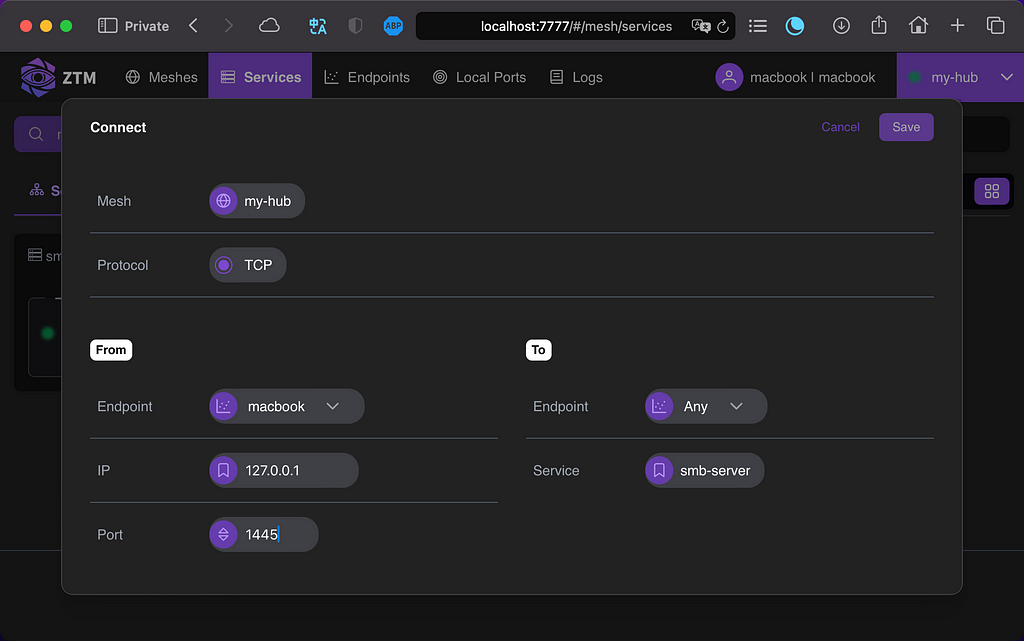
Enter the port information in the popup window.
- IP: Service mapping address. If only accessed by the current device, select 127.0.0.1. If accessible to other devices in the LAN, enter the current device’s LAN address.
- Port: Service mapping port, which cannot conflict with other ports. Here we map the smb-server service to port 1445.
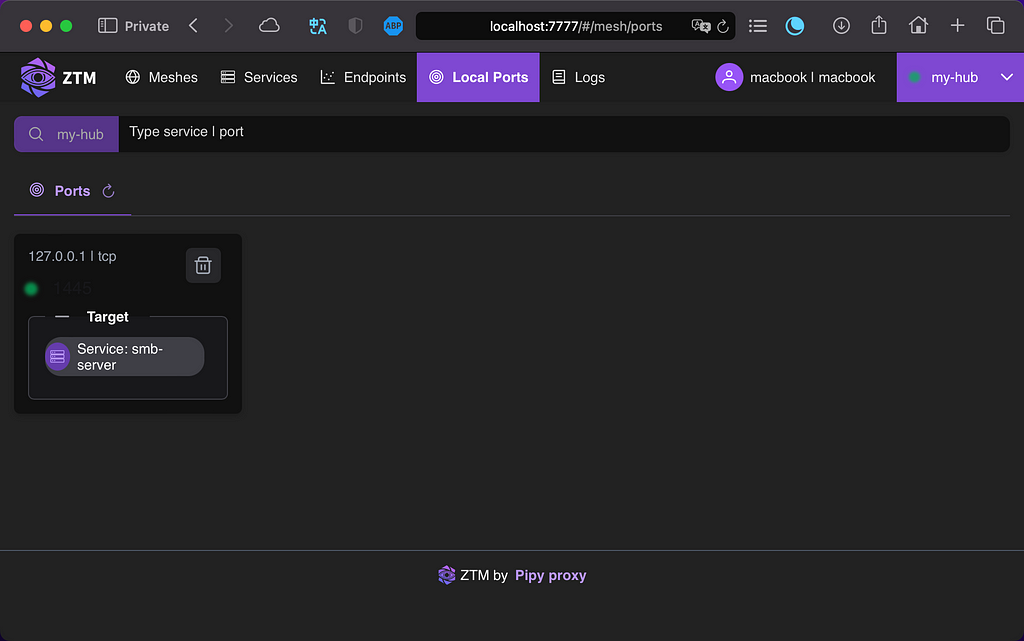
In the Local Ports tab, you can see the created local port.
9. Testing
In macOS, open Finder, select Go -> Connect to Server… from the menu. Enter smb://127.0.0.1:1445/nvme11 in the popup. /nvme11 is my SMB service directory name.
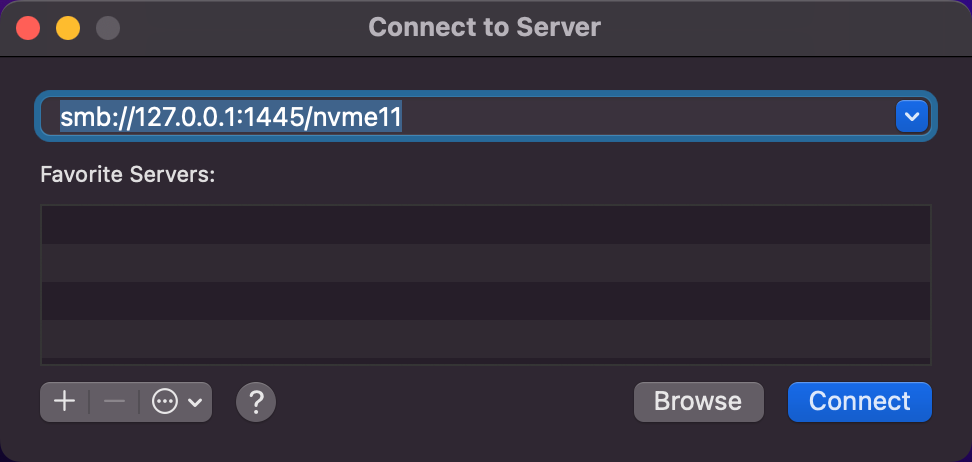
Click Connect, and you will see the connected SMB service in the Finder sidebar. Viewing its information shows the network address.
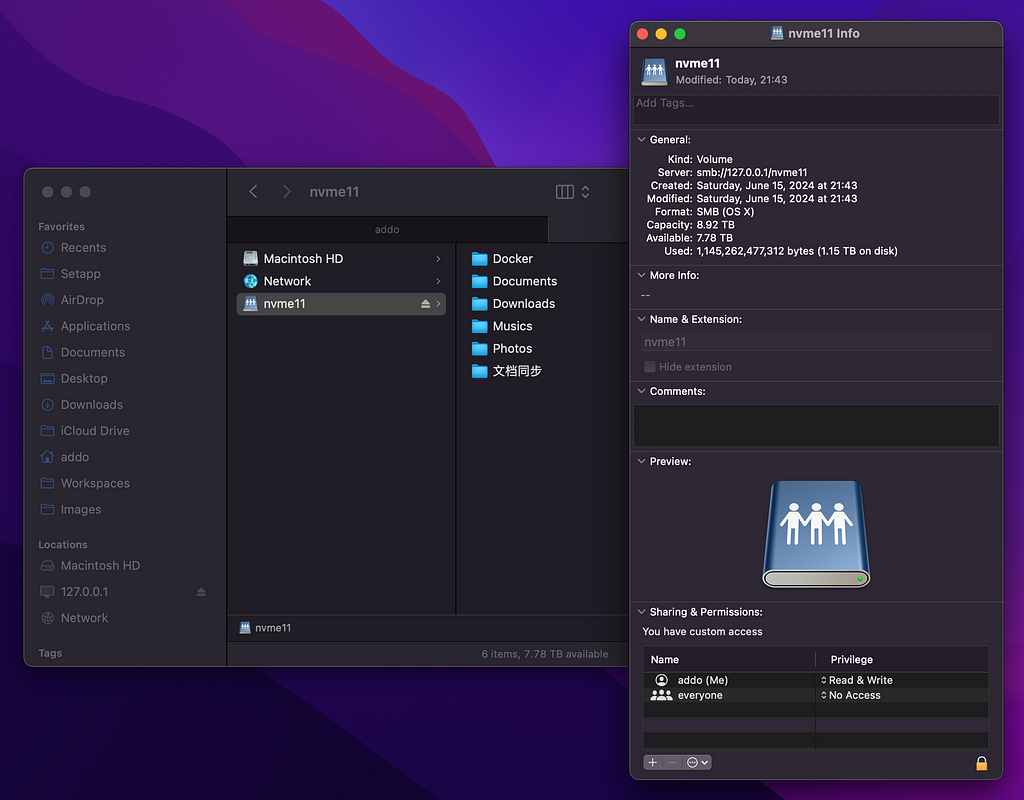
You can now manage the remote SMB service like a local file system.
Conclusion
Transmitting SMB protocol data in a ZTM environment is a simpler, more efficient, and secure solution, especially suitable for scenarios requiring data transmission over wide area networks or untrusted networks. This method not only enhances the security of the original SMB service but also simplifies the complexity of management and deployment.
<hr /><p>Securely access SMB shared files across the Internet using ZTM was originally published in Flomesh on Medium, where people are continuing the conversation by highlighting and responding to this story.</p>