

In the previous article, we briefly introduced the features and capabilities of ZTM and demonstrated step-by-step how to use ZTM to access home networks without a fixed public IP.
ZTM (Zero Trust Mesh) is an open-source network infrastructure software for running decentralized networks. It is built on HTTP/2 tunnels and can operate on any type of IP network, such as LANs, containerized networks, and the internet.
With the release of ZTM 0.0.3, ease of use has significantly improved, such as running components in the background without relying on other tools like screen.
For more information about ZTM and the background of this article, please refer to the previous article.
Demonstration
First, let’s introduce today’s demonstration environment:
- Home/Private Network: This network includes my HomeLab virtual machines and Windows devices without a fixed public IP.
- Public Cloud Network: A low-spec cloud host with 1 core CPU, 1GB RAM, and 5Mbps bandwidth, at a very low cost.
- Public Network: Mobile network or public Wi-Fi in cafes/malls, which I often use.
During the demonstration, I will switch between these three environments to configure ZTM. Don’t worry; this configuration is a one-time setup, not a regular task.
Architecture
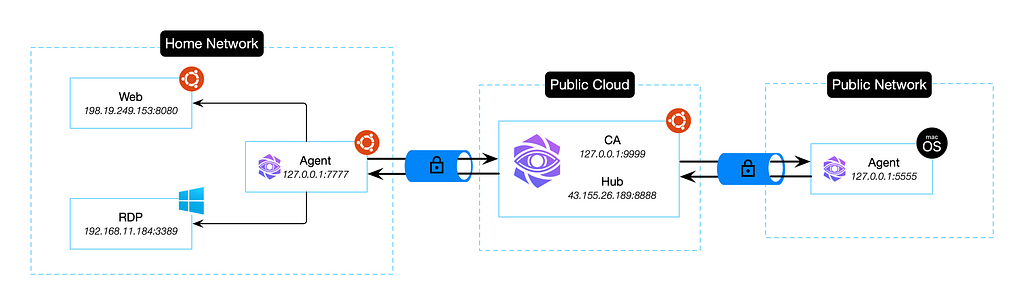
Below is the architecture diagram of the demonstration environment:
- The left represents the home network with web services running on the HomeLab and a Windows PC, along with a running ZTM Agent.
- The middle represents the public cloud network with a fixed public IP, where ZTM Hub is deployed to provide access relay and other functions. Additionally, the ZTM CA service issues certificates for the Hub and Agents, used for encrypted data transmission, identity authentication, and access authorization.
- The right represents the public network, where my MacBook is used to access services and devices in the home network, also running the ZTM Agent.
Agents on both sides establish encrypted secure reverse tunnels to the cloud host, so the networks they are in do not need a fixed public IP.
Let’s get started!
Installing ZTM
First, we will install ZTM on the cloud host, deploying the CA service and Hub. Download and install the executable file for the Linux platform from the release page.
curl -sL https://github.com/flomesh-io/ztm/releases/download/v0.0.3/ztm-aio-v0.0.3-generic_linux-x86_64.tar.gz | tar -zxf -
sudo cp bin/ztm /usr/local/bin/ztm
Starting the CA Service
Start the ZTM CA service with the following command. This command creates a system service, with the CA service listening on port 9999 by default. You can change the port by modifying the /etc/systemd/system/ztm-ca.service configuration (note: after modification, execute systemctl daemon-reload to reload the configuration and restart the service with systemctl restart ztm-ca). Alternatively, you can change the port during startup with the --listen parameter.
sudo ztm start ca --listen 127.0.0.1:9999
Starting the Hub
Execute the command to start the Hub service, which listens on port 8888 by default. Once started, the Hub will obtain certificates from the CA service.
sudo ztm start hub
Let’s begin with a simple service access.
Scenario 1: Accessing Services in the Home Network
Home Network Access
On the cloud host, generate a certificate for the home device through the CA service: specify the Agent name home and the Hub address 43.155.26.189:8888, and save the generated content in home.json. This file contains the Hub address, the certificate and key allocated to the Agent, and the CA certificate.
ztm invite home --bootstrap 43.155.26.189:8888 --output > home.json
On the device in the home network, start the Agent; in this case, it’s an Ubuntu virtual machine. Install ZTM first as described in the Installing ZTM section.
After installing ZTM, start the Agent with the following command. It listens on 127.0.0.1:7777 by default.
sudo ztm start agent
After starting the Agent, use the previously generated home.json to connect to the Hub.
ztm join my-hub --as home --permit home.json
Check the connection status. A status of Connected indicates that the Agent successfully connected to the Hub.
ztm get mesh
NAME    JOINED AS  USER  HUBS                 STATUS
my-hub  home       home  43.155.26.189:8888  Connected
Use ztm get endpoint to view endpoint information, such as IP addresses, ports, and statuses. At this point, only one Agent is connected to the Hub, so only one record is displayed.
NAME          USER  IP             PORT   STATUS
home (local)  home  103.116.72.46  53141  Online
Next, register the home network service to the Mesh. Here, we simulate a simple web service with Pipy: pipy 'pipy.listen(8080, $=>$.serveHTTP(new Message("hi")))'.
When registering a service, provide the following information:
- Service name: format protocol/NAME, currently supports tcp and udp protocols.
- Host address
- Port
ztm create service tcp/hi --host 127.0.0.1 --port 8080
View the service information.
ztm get service
NAME    ENDPOINTS
tcp/hi  1
At this point, we have completed connecting the home network to the Mesh and registering the service.
Next, let’s try accessing the service in the home network from an external network.
External Network Access
Now, connect my computer to an external network (using a mobile hotspot for testing).
On the cloud host, generate a certificate for my computer through the CA service.
ztm invite macbook --bootstrap 43.155.26.189:8888 --output > macbook.json
Download and install the executable file for the macOS platform from the release page.
curl -sL https://github.com/flomesh-io/ztm/releases/download/v0.0.3/ztm-aio-v0.0.3-macos-arm64.tar.gz | tar -zxf -
sudo cp bin/ztm /usr/local/bin/ztm
Start the Agent and use the configuration macbook.json to join the Hub network.
sudo ztm start agent
ztm join my-hub --as macbook --permit macbook.json
Check the status; Connected indicates successful network access.
ztm get mesh
NAME            JOINED AS  USER     HUBS                 STATUS
my-hub          macbook    macbook  43.155.26.189:8888  Connected
At this point, viewing endpoint information shows two endpoints: one is the current device (displayed as local), and the other is the home Agent connected earlier.
ztm get endpoint
NAME             USER     IP             PORT   STATUS
home             home     103.116.72.46  53141  Online
macbook (local)  macbook  45.62.167.232  32897  Online
Viewing the service shows the hi service registered in the home network.
ztm get service
NAME    ENDPOINTS
tcp/hi  1
To access the hi service from the local machine, map the service to a local port. Provide the following information:
- Port name format host/protocol/port, here it is 127.0.0.1/tcp/18080
- The service name to map
ztm create port 127.0.0.1/tcp/18080 --service tcp/hi
You can also view port information from the command line.
ztm get port
NAME                 ENDPOINT  SERVICE
127.0.0.1/tcp/18080  macbook   tcp/hi
Testing
Accessing 127.0.0.1:18080 on the current device shows a successful return.
curl -i 127.0.0.1:18080
HTTP/1.1 200 OK
content-length: 2
connection: keep-alive
hi
Next, let’s try accessing a Windows device in the home network remotely.
Scenario 2: Accessing Remote Windows Desktop
In the home network, there is a Windows device with IP address 192.168.11.247 and remote desktop login enabled.
Registering Windows Remote Login Service
Connect to the home network. On the home network Agent, register another service RDP and fill in the Windows device's IP and port (default is 3389).
ztm create service tcp/RDP --host 192.168.11.247 --port 3389
Now our home network exposes two services: hi and RDP.
ztm get service
NAME     ENDPOINTS
tcp/hi   1
tcp/RDP  1
macOS
Switch back to the external network. Use the command ztm get service to see the RDP service registered in the home network.
Next, map the RDP service to the local 127.0.0.1:13389.
ztm create port 127.0.0.1/tcp/13389 --service tcp/RDP
Mapping completed.
ztm get port -m my-hub
NAME                 ENDPOINT  SERVICE
127.0.0.1/tcp/18080  macbook   tcp/hi
127.0.0.1/tcp/13389  macbook   tcp/RDP
Testing
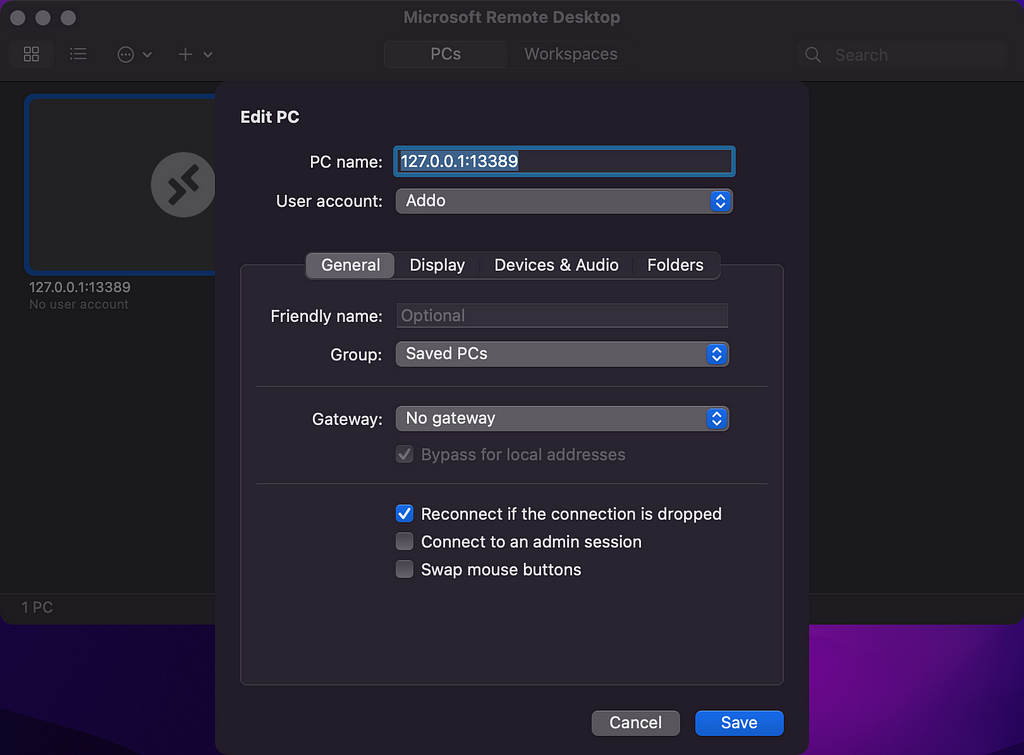
This time, use Microsoft Remote Desktop on macOS to access the remote desktop.
Add a PC with the address 127.0.0.1:13389 and the Windows device's login credentials.
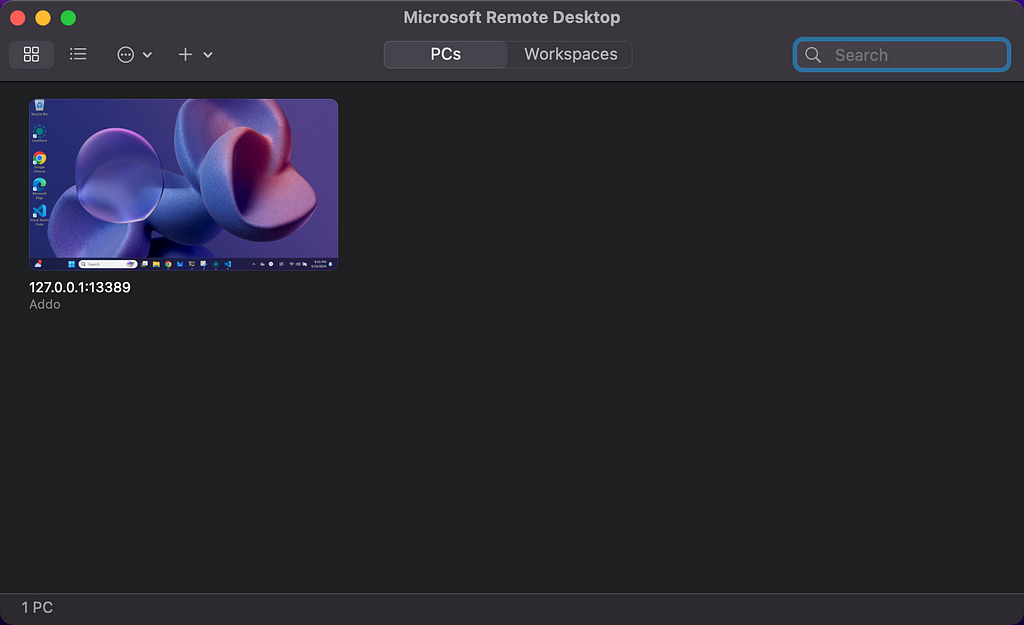
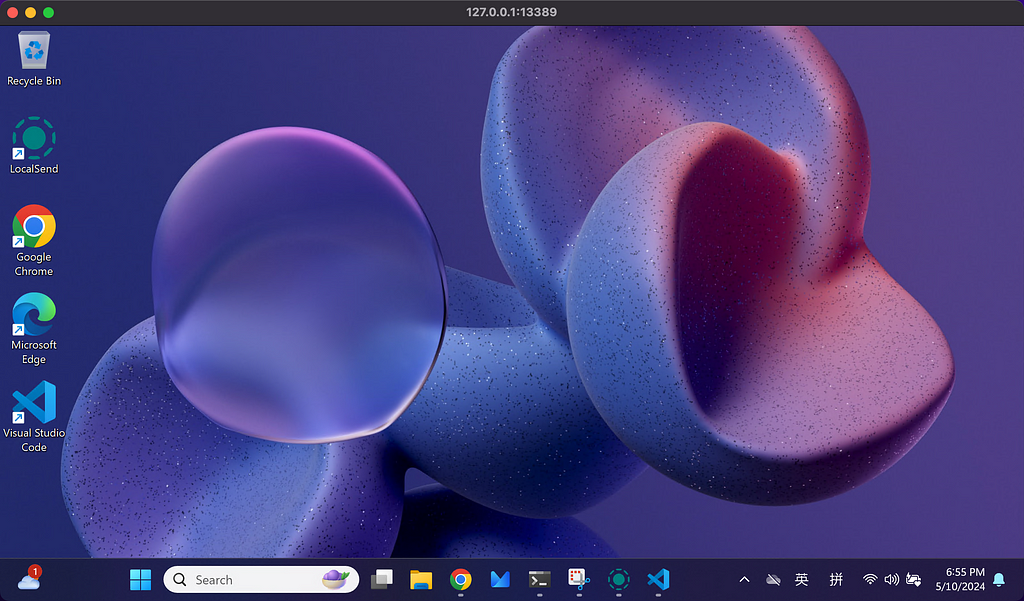
After logging in, you can remotely operate the Windows device.
Summary
Building on the previous article, this demonstration showed how to configure ZTM components and networks via command line. All operations can be completed in the terminal, thanks to the optimizations brought by ZTM version 0.0.3.
Stay tuned for future ZTM upgrades, as we will provide more features and scenario demonstrations.
<hr /><p>Updated: How to Access Home/Private Networks Using ZTM was originally published in Flomesh on Medium, where people are continuing the conversation by highlighting and responding to this story.</p>